Best Dessert Cup Recipes You Need to Try Now
Have you ever wondered how a simple dessert cup recipe can transform your snack time into a delightful experience? I remember the first time I discovered these easy-to-make desserts, and I was instantly captivated by their versatility and healthy indulgence. Not only do these treats offer nutritional benefits, but they also provide practical solutions for busy lifestyles—ensuring portion control without sacrificing flavor. Moreover, with clear, step-by-step instructions and creative twists for dietary restrictions, every recipe becomes an inviting adventure in your kitchen. So, why not dive in and explore the world of dessert cup recipes that promise both taste and wellness?
Table of Contents
Key Benefits of Dessert Cup Recipes
Embarking on the journey of creating dessert cup recipes opens up a world of culinary advantages that make these treats a must-try for every kitchen enthusiast. Whether you’re short on time or seeking a healthier way to indulge, dessert cup recipes deliver practical benefits with every bite. Here’s why you should consider adding them to your cooking repertoire:
- Nutritional Balance: These recipes allow you to control portions and incorporate nutritious ingredients such as fresh fruits, nuts, and natural sweeteners. This balance not only satisfies your sweet tooth but also supports a wholesome diet.
- Convenience and Flexibility: With easy-to-follow instructions and minimal preparation time, dessert cup recipes are ideal for busy lifestyles. Moreover, they are highly versatile—you can quickly modify the ingredients to cater to dietary restrictions like gluten-free or vegan preferences. For example: Gluten-Free Option: Substitute regular flour with almond or coconut flour. Vegan Twist: Replace dairy products with plant-based alternatives like almond milk or coconut cream.
- Enhanced Portion Control: Dessert cups come in perfect serving sizes that prevent overindulgence while still delivering a satisfying treat. This makes them a smart choice for anyone looking to enjoy dessert without compromising on health.
- Creative Experimentation: The format encourages experimentation. Whether you’re adding a unique spice, incorporating seasonal fruits, or exploring new textures, each dessert cup becomes a canvas for culinary creativity. Additionally, using colorful ingredients can elevate the visual appeal of your dish, making it as Instagram-worthy as it is delicious.
By embracing dessert cup recipes, you not only streamline your dessert-making process but also unlock a range of benefits—from nutritional perks to the joy of creating something uniquely yours. So, gather your favorite ingredients, follow these simple guidelines, and transform your dessert experience today!
Ingredients for Dessert Cup Recipes
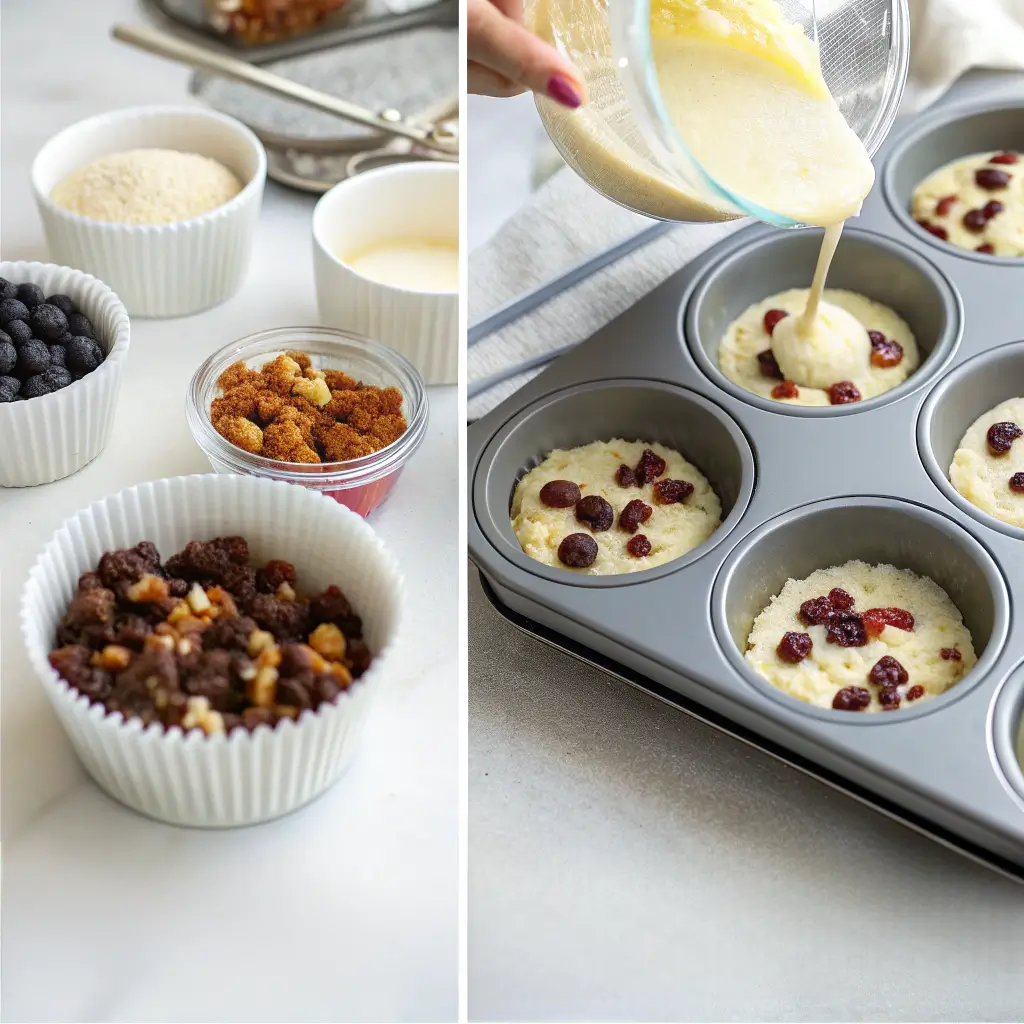
Gathering the right ingredients is the first step toward creating a delightful dessert cup that’s both delicious and adaptable to your dietary needs. Below is a curated list designed to offer flexibility, flavor, and health benefits—all while keeping the process simple and approachable:
Dry Ingredients:
- Almond Flour (1/2 cup): Provides a gluten-free base with a subtly nutty flavor. (Tip: Substitute with coconut flour for a different twist, Learn more about gluten-free flour alternatives at King Arthur Baking’s Gluten-Free Guide)
- Unsweetened Cocoa Powder (1/4 cup): Delivers a rich chocolate flavor without added sugars.
- Baking Powder (1 teaspoon): Helps your dessert rise to perfection.
- Salt (1/2 teaspoon): Enhances overall flavor balance.
Wet Ingredients:
- Almond Milk (1 cup): A dairy-free alternative that blends smoothly with other ingredients. (Alternative: Use coconut milk or any plant-based milk.)
- Natural Sweetener (1/2 cup): Options like honey or maple syrup add a gentle sweetness without refined sugars.
- Vanilla Extract (1 teaspoon): Infuses warmth and depth into your dessert.
Optional Add-Ins and Toppings:
- Chopped Nuts (1/2 cup): For a delightful crunch; walnuts or pecans work beautifully.
- Fresh Berries (1/2 cup): Adds a burst of color and natural sweetness when used as a garnish.
- Cinnamon or Nutmeg (a pinch): Provides an extra layer of spice to elevate the flavor.
Each ingredient plays a crucial role in balancing taste and texture, ensuring your dessert cups not only look appealing but also offer a satisfying bite. By opting for these high-quality components, you’re setting the stage for a treat that’s both indulgent and health-conscious. Enjoy the creative freedom to tweak measurements or substitute ingredients according to your taste or dietary needs, and have fun experimenting with your personal twist on this delightful recipe!
How to Make Dessert Cup Recipes
Let’s dive into creating your dessert cup masterpiece with a clear, step-by-step guide that’s both fun and easy to follow. This section outlines each stage of the process, ensuring you enjoy every moment in the kitchen while crafting a treat that’s as delightful as it is delicious.
Preheat and Prepare:
- Preheat your oven to 350°F (175°C). This step ensures even baking, making your dessert cups rise perfectly.
- Grease your ramekins or dessert cups lightly with a non-stick spray or a small amount of coconut oil for a smooth release.
Mix the Dry Ingredients:
- In a medium bowl, sift together the almond flour, unsweetened cocoa powder, baking powder, and salt. This helps to remove any lumps and evenly distributes the ingredients, ensuring a consistent texture in your dessert.
- Tip: Stir gently to avoid over-mixing, which can affect the final texture.
Combine the Wet Ingredients:
- In another bowl, whisk the almond milk, natural sweetener, and vanilla extract until they’re well combined. This creates a smooth mixture that will blend seamlessly with the dry ingredients.
- Note: Use a fork or small whisk to mix quickly and efficiently.
Merge and Stir:
- Gradually pour the wet ingredients into the dry ingredients. Stir continuously using a spatula until the mixture is just combined. It’s important to work quickly yet carefully, so you maintain a light and airy batter.
- Actionable Insight: Avoid over-stirring; a few lumps are okay as they contribute to a soft, moist texture.
Fill the Dessert Cups:
- Spoon the batter evenly into your prepared ramekins or dessert cups. Fill each cup about 2/3 full to allow room for the dessert to rise.
- Optional: Sprinkle your chosen add-ins, like chopped nuts or a pinch of cinnamon, on top for extra flavor and texture.
Bake to Perfection:
- Place the filled dessert cups on a baking tray and slide them into the preheated oven.
- Bake for 15-20 minutes, or until the edges are set and a toothpick inserted into the center comes out clean. This timing ensures your dessert cups are perfectly moist inside with a slight crispness on the edges.
- Visual Tip: The tops should have a light, golden-brown hue when done.
Cool and Serve:
- Remove the dessert cups from the oven and allow them to cool for 5 minutes. This brief resting period helps the flavors meld together and makes handling easier.
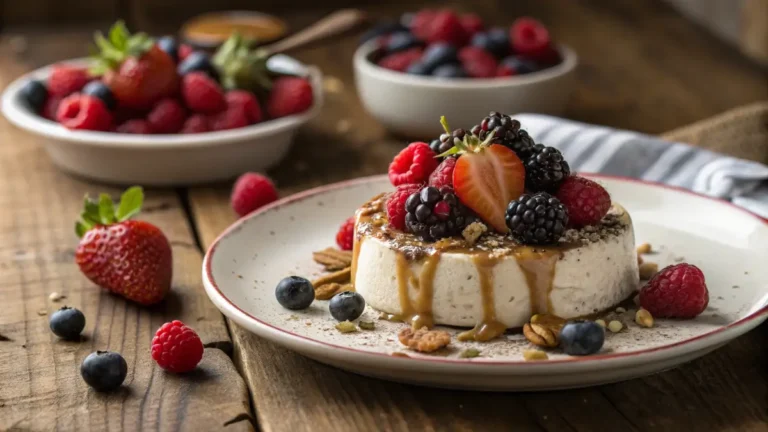
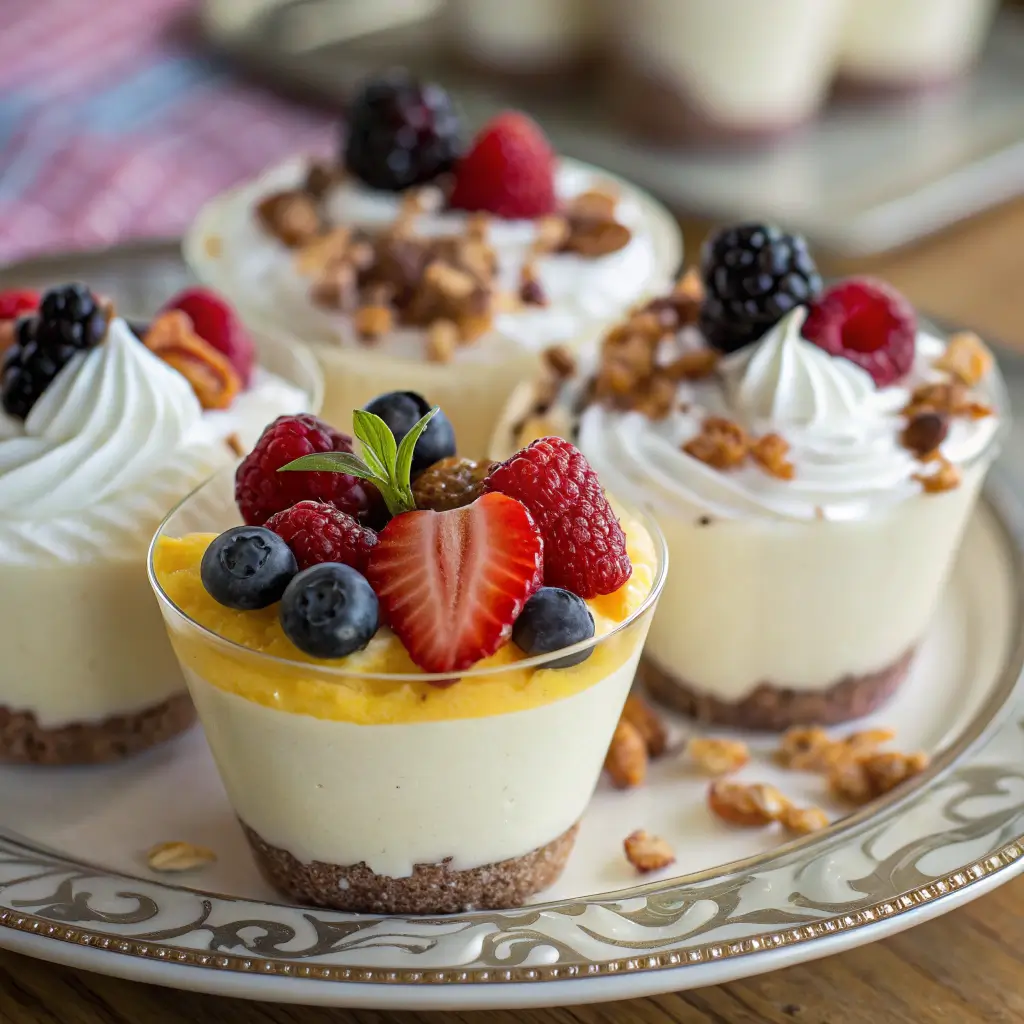
- For a finishing touch, consider adding a dollop of dairy-free whipped cream or a scatter of fresh berries on top before serving.
By following these simple, actionable steps, you can confidently create dessert cup recipes that are both impressive and approachable. Enjoy the process, and remember that every step is an opportunity to add your unique twist to this delightful treat!
Pro Tips and Variations
Elevate your dessert cup recipes with a few professional tips and creative variations that make your treats truly stand out. Here are some actionable insights and suggestions to customize your dessert cups to suit your personal taste and dietary needs:
Enhance Flavor and Texture:
- Mix-Ins: Add a handful of mini chocolate chips, chopped nuts, or even shredded coconut to the batter before baking. This not only boosts flavor but also introduces delightful texture contrasts.
- Spice It Up: For an unexpected twist, sprinkle a pinch of cinnamon or nutmeg into the batter. These warm spices blend seamlessly with the chocolate and enhance the overall aroma.
Smart Substitutions:
- Dairy-Free Delights: If you’re avoiding dairy, substitute traditional milk with almond milk, coconut milk, or any plant-based alternative. Each option lends a subtle, unique flavor while keeping the recipe light.
- Gluten-Free Goodness: For a gluten-free version, opt for almond flour or coconut flour instead of regular wheat flour. These alternatives not only accommodate dietary restrictions but also add a pleasant nutty taste.
Customization Tips:
- Layering Flavors: Consider layering different flavors by alternating between a light vanilla batter and a rich cocoa batter in the same cup. This creates a visually appealing marbled effect and a delightful flavor surprise.
- Top It Off: Once baked, top your dessert cups with a drizzle of honey or a squeeze of fresh citrus juice. These finishing touches add brightness and balance to the sweetness.
Baking Adjustments:
- Monitor Your Oven: Since every oven bakes differently, keep a close eye on your dessert cups during the last few minutes of baking. Look for a firm edge and a slightly soft center to ensure a perfectly moist dessert.
- Cooling Time Matters: Allow your dessert cups to cool in the ramekins for a few minutes before transferring them to a cooling rack. This helps set the structure and intensifies the flavors.
Serving Variations:
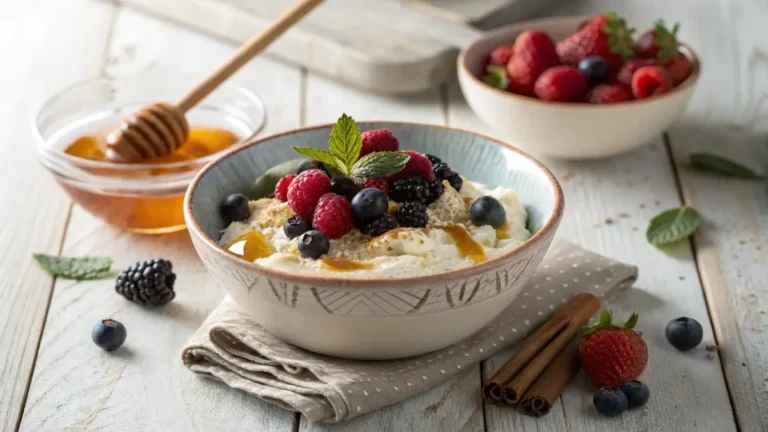
- Breakfast Boost: Serve your dessert cups as a quick, energizing breakfast option by pairing them with a dollop of dairy-free yogurt and a sprinkle of granola.
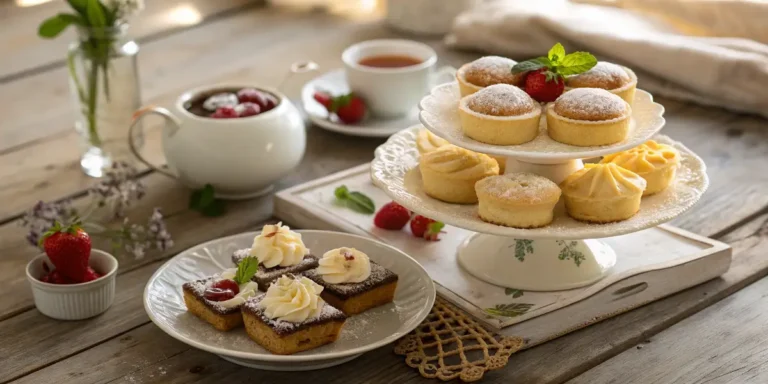
- Party Pleasers: For an elegant touch at gatherings, dress up your dessert cups with a light dusting of powdered sugar and a few fresh berries on top. These small details can transform a simple dessert into a memorable treat.
By experimenting with these pro tips and variations, you can create dessert cup recipes that are not only delicious but also perfectly tailored to your lifestyle and taste. Enjoy the process, have fun with creative tweaks, and let your culinary creativity shine!
Serving Suggestions
Enhance your dessert cup recipes by pairing them with creative and complementary serving ideas. These suggestions not only elevate the presentation but also transform your dessert into a complete culinary experience. Here are some actionable tips and ideas to inspire you:
Garnish Ideas:
- Fresh Fruit Medley: Top your dessert cups with sliced strawberries, blueberries, or kiwi. This not only adds vibrant color but also provides a burst of natural sweetness.
- Dairy-Free Whipped Cream: Add a dollop of coconut or almond milk whipped cream for a light, airy texture that contrasts beautifully with the rich dessert base.
- Crunchy Elements: Sprinkle a few toasted nuts or a light dusting of cocoa powder on top to create a delightful crunch and enhance the overall flavor profile.
Pairing Options:
- Breakfast Boost: Serve your dessert cups alongside a bowl of Greek yogurt or a vegan alternative. This pairing makes for a balanced breakfast that offers protein and healthy fats.
- Afternoon Delight: Pair your treat with a refreshing herbal tea or a cup of decaf coffee. The mild flavors of these beverages create the perfect harmony with the dessert’s sweetness.
- Evening Indulgence: For a more decadent option, consider a warm, caffeine-free hot chocolate or a dairy-free latte to complement the dessert’s rich, comforting taste.
Creative Serving Styles:
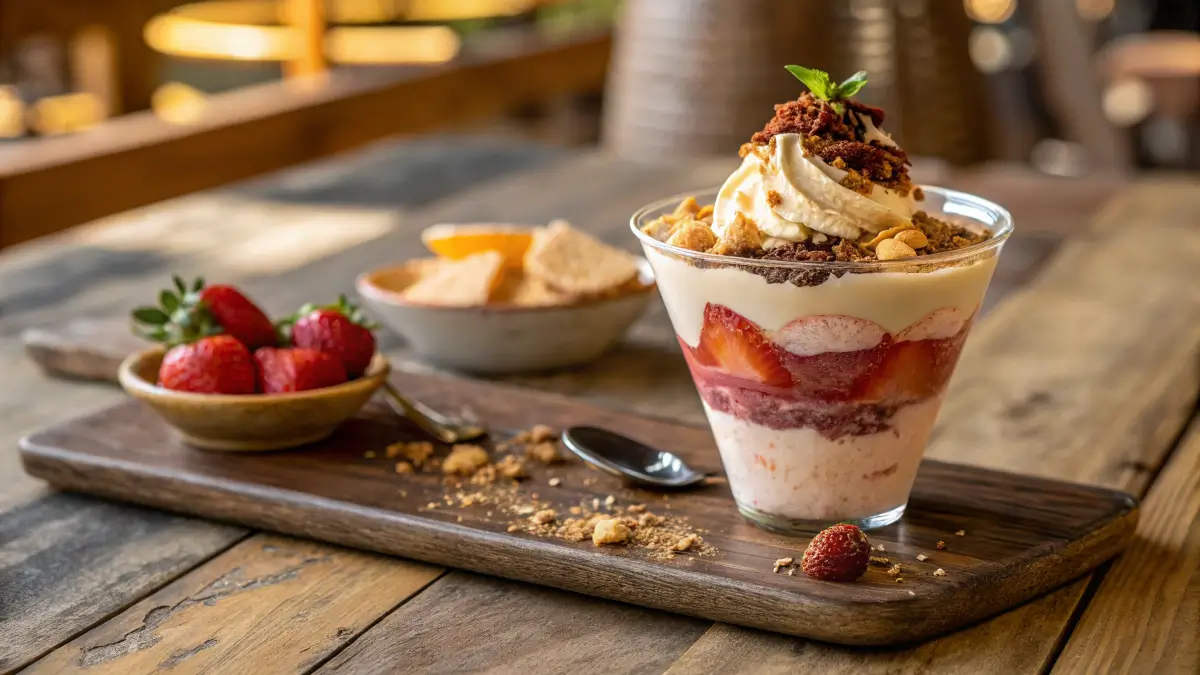
- Layered Parfait: Create a visually stunning parfait by layering your dessert cups with fruit compote, granola, and a drizzle of natural sweetener. This approach not only enhances the flavor but also makes for an Instagram-worthy presentation.
- Mini Dessert Buffet: Arrange several dessert cups on a decorative tray and let guests choose their favorite topping or garnish. This interactive style adds a fun twist to any gathering and encourages culinary creativity.
- Seasonal Twist: Adapt your serving suggestions to the season—add a sprinkle of cinnamon and nutmeg in the fall or a splash of fresh lemon juice in the summer for an extra zing.
By exploring these serving suggestions, you can turn a simple dessert cup into a versatile dish that suits any meal or occasion. Experiment with different pairings and garnishes to discover what best enhances your creation, and don’t be afraid to add your personal flair to make the experience truly memorable. Enjoy serving these treats as a delightful conclusion to any meal or a quick indulgence to brighten your day!
Common Problems and Solutions
Even the best dessert cup recipes can sometimes present minor challenges. Below are some common problems you might encounter in your kitchen, along with practical solutions to help you troubleshoot and perfect your dessert cups.
Problem: Batter is too thick or lumpy.
Solution: Gradually add a splash more almond milk while mixing to achieve a smooth, evenly blended batter. Use a whisk to break up any lumps, and remember that a few small lumps can enhance texture without compromising taste.
Problem: Dessert cups are undercooked or overly moist in the center.
Solution: Double-check your oven temperature with an oven thermometer to ensure accuracy. If undercooked, extend the baking time by 2-3 minutes and perform a toothpick test again. Conversely, if the center is too moist, reduce the amount of almond milk slightly in your next attempt.
Problem: Desserts stick to the ramekins or cups.
Solution: Thoroughly grease your ramekins or dessert cups with a light coating of coconut oil or non-stick spray before adding the batter. Allow the dessert cups to cool for a few minutes after baking to let them firm up before attempting to remove them.
Problem: Overmixing the batter leading to a dense texture.
Solution: Combine the wet and dry ingredients slowly and stir just until incorporated. Avoid vigorous mixing; a light hand preserves the airy texture of the dessert cups.
Problem: Inconsistent rise or uneven baking.
Solution: Distribute the batter evenly among the cups, filling them about 2/3 full to allow room for a uniform rise. Rotate the baking tray halfway through the cooking time to ensure even heat distribution across all dessert cups.
By addressing these common issues with actionable solutions, you can troubleshoot your dessert cup recipes with confidence. Remember, each challenge is an opportunity to refine your technique and achieve that perfect balance of texture and flavor. Happy baking!
Conclusion
In summary, dessert cup recipes offer a delightful blend of convenience, creativity, and health-conscious indulgence that makes every bite a joy. By following our step-by-step guide, you’ve learned how to combine simple ingredients into a treat that is both visually appealing and irresistibly tasty. Here’s a quick recap to keep in mind:
- Nutritional Benefits: Enjoy portion-controlled desserts that can be easily adapted for a gluten-free or vegan diet.
- Easy Preparation: With clear, numbered steps and practical tips, you can confidently create dessert cups even on a busy day.
- Creative Customization: Experiment with mix-ins, spices, and toppings to make each dessert cup uniquely yours.
- Troubleshooting Tips: Our common problems and solutions section ensures that you can overcome any minor challenges in the kitchen.
As you wrap up your baking session, take a moment to admire your work and consider sharing your delicious creations on social media. Your dessert cups not only make for a perfect treat but also a creative canvas for your culinary innovations. Ready to delight your taste buds and impress your loved ones? Give this recipe a try and let your kitchen become a hub of creativity and joy. Happy baking, and don’t forget to share your experience in the comments below!
Hungry for more delicious creations? Browse our site for more recipes and endless inspiration to spark your next culinary adventure!
Chocolate Almond Dessert Cups
Ingredients
Dry Ingredients:
- ½ cup almond flour or substitute with coconut flour for a different texture
- ¼ cup unsweetened cocoa powder
- 1 teaspoon baking powder
- ½ teaspoon salt
Wet Ingredients:
- 1 cup almond milk or any plant-based milk of choice
- ½ cup natural sweetener honey, maple syrup, or agave syrup
- 1 teaspoon vanilla extract
Optional Add-Ins and Toppings:
- ½ cup chopped nuts walnuts or pecans for extra crunch
- ½ cup fresh berries for a burst of natural sweetness and color
- A pinch of cinnamon or nutmeg to elevate the flavor
Instructions
Preheat and Prepare
- Preheat your oven to 350°F (175°C) to ensure even baking.
- Lightly grease your ramekins or dessert cups with non-stick spray or coconut oil for easy removal.
Mix the Dry Ingredients
- In a medium bowl, sift together almond flour, cocoa powder, baking powder, and salt to remove lumps and ensure even distribution.
- Tip: Stir gently to avoid over-mixing, which can affect texture.
Combine the Wet Ingredients
- In another bowl, whisk together almond milk, natural sweetener, and vanilla extract until smooth.
- Note: A small whisk or fork helps blend the mixture efficiently.
Merge and Stir
- Gradually pour the wet ingredients into the dry ingredients, stirring continuously with a spatula.
- Avoid over-stirring—a few lumps are okay for a soft, moist texture.
Fill the Dessert Cups
- Spoon the batter evenly into prepared ramekins, filling each about ⅔ full to allow for rising.
- Optional: Sprinkle chopped nuts or a pinch of cinnamon on top for added flavor.
Bake to Perfection
- Place ramekins on a baking tray and bake for 15-20 minutes.
- Check for doneness by inserting a toothpick in the center—it should come out clean.
- Visual Tip: The tops should be slightly firm with a light golden-brown hue.
Cool and Serve
- Let the dessert cups cool for 5 minutes before serving.
- Garnish with whipped cream, fresh berries, or a drizzle of honey for an extra treat.
Video
Notes
For extra richness: Add a handful of dark chocolate chips into the batter.
Storage: Store leftovers in an airtight container for up to 3 days or refrigerate for up to a week.
Frequently Asked Questions
Can I freeze dessert cups for later enjoyment?
Absolutely! To freeze, let the dessert cups cool completely, then transfer them to an airtight container. When you’re ready to enjoy them, simply thaw in the refrigerator overnight or reheat in a microwave for 20-30 seconds.
How do I ensure my dessert cups don’t stick to the ramekins?
To prevent sticking, lightly grease your ramekins with coconut oil or non-stick spray before filling them with batter. Additionally, allowing the dessert cups to cool for 5 minutes after baking makes them easier to remove.
Can I substitute ingredients for dietary restrictions?
Yes, dessert cup recipes are highly adaptable.
Gluten-Free: Use almond or coconut flour instead of regular wheat flour.
Vegan: Replace dairy milk with almond, coconut, or oat milk, and choose a vegan natural sweetener like maple syrup.
Nut-Free: Consider using oat flour or rice flour if you need to avoid nuts.
What should I do if my dessert cups come out too dense?
A dense texture may result from over-mixing or an imbalance of wet and dry ingredients. To avoid this, stir just until the ingredients are combined, and consider reducing the mixing time. A few small lumps are perfectly fine and can even contribute to a soft, moist texture.
How can I add a unique twist to the classic dessert cup?
Experiment with different mix-ins and toppings!
Mix-Ins: Add mini chocolate chips, fresh berries, or chopped nuts to the batter for extra texture.
Toppings: Drizzle with dairy-free whipped cream, sprinkle with cinnamon, or add a dusting of cocoa powder to enhance flavor and presentation.
These FAQs aim to address common concerns and provide helpful insights, ensuring your dessert cup recipes are both successful and enjoyable every time you bake. Happy cooking, and feel free to reach out with any other questions you might have!