Butterfinger Balls Recipe : The Ultimate Treat You Need to Try
Have you ever wondered how a simple treat could bring both joy and a nutritional boost to your day? For balanced nutrition guidelines and more on creating a well-rounded diet, check out the USDA MyPlate Guidelines. I’m excited to share my favorite butterfinger balls recipe—a delicious, energy-packed delight that’s perfect for any occasion. As I experimented in my kitchen, I discovered that these treats not only satisfy your sweet cravings but also offer a fun twist on classic recipes. In addition, each step of this guide is designed to make your cooking experience smooth and enjoyable. Let’s dive in and create a treat that promises both flavor and a little extra sparkle to your routine!
Table of Contents
Key Benefits of Butterfinger Balls Recipe
When you make these delectable butterfinger balls, you’re not just preparing a treat—you’re embracing a recipe that delivers a multitude of benefits. Here’s why this butterfinger balls recipe is a game-changer:
- Nutritional Boost: Enjoy an energy-packed snack that not only satisfies your sweet tooth but also provides a quick pick-me-up during busy days. This treat is designed with balanced ingredients, ensuring you get a mix of protein, fiber, and healthy fats.
- Practical and Easy: Perfect for busy mornings or a last-minute dessert, this recipe requires minimal preparation and delivers maximum flavor. With straightforward steps and common ingredients, even novice cooks can create a professional-quality treat.
- Versatile Delight: Whether you’re hosting a get-together or enjoying a quiet moment alone, these butterfinger balls cater to various occasions. Their customizable nature means you can tweak ingredients to suit dietary needs, including gluten-free or vegan variations.
- Mood-Enhancing Experience: Indulging in this treat can lift your spirits, thanks to its delightful blend of textures and flavors. Each bite promises not only a taste sensation but also a comforting reminder of the joy found in simple culinary pleasures.
In addition, by preparing this recipe, you’re stepping into a world of creative cooking that invites you to experiment and personalize. So, gather your ingredients, follow the guide, and enjoy every moment of this delicious culinary journey!
Ingredients for Butterfinger Balls Recipe
Before you start, gather these high-quality ingredients to ensure a smooth and delicious cooking experience. Each item has been carefully selected to enhance the flavor and texture of your butterfinger balls, while also accommodating various dietary needs:
- Butterfinger Candy Bars: Approximately 10 bars, roughly chopped (Tip: Opt for dairy-free versions if available, ensuring a versatile treat)
- Crisped Rice Cereal: 2 cups (gluten-free options work perfectly) (Why it matters: Adds a satisfying crunch to every bite)
- Peanut Butter: 1/2 cup (or substitute with almond butter for a vegan alternative) (Fun fact: This ingredient not only binds the mixture but also enriches it with protein)
- Honey: 1/3 cup (replace with maple syrup for a vegan-friendly option) (Note: Honey provides natural sweetness and helps hold the balls together)
- Vanilla Extract: 1 teaspoon (For an extra layer of flavor: This small addition makes a big difference)
- Salt: A pinch to balance the sweetness (Remember: Even a little salt can enhance the overall taste)
- Dark Chocolate Chips (Optional): 1/4 cup (choose dairy-free if needed) (Optional twist: These can be melted and drizzled over the balls for an extra indulgent finish)
In addition, feel free to experiment with these ingredients to suit your personal taste or dietary requirements. With everything prepped and ready, you’re all set to create a treat that’s not only irresistibly delicious but also crafted with care and precision.
How to Make Butterfinger Balls Recipe
Follow these simple steps to create your very own irresistible butterfinger balls. I’ve broken down the process into easy-to-follow steps, so you can enjoy a fun, stress-free cooking experience:
Prepare Your Workspace:
- Gather all your ingredients and equipment.
- Ensure the butterfinger candy bars are roughly chopped and your crisped rice cereal is measured out. This step sets a smooth pace for the recipe.
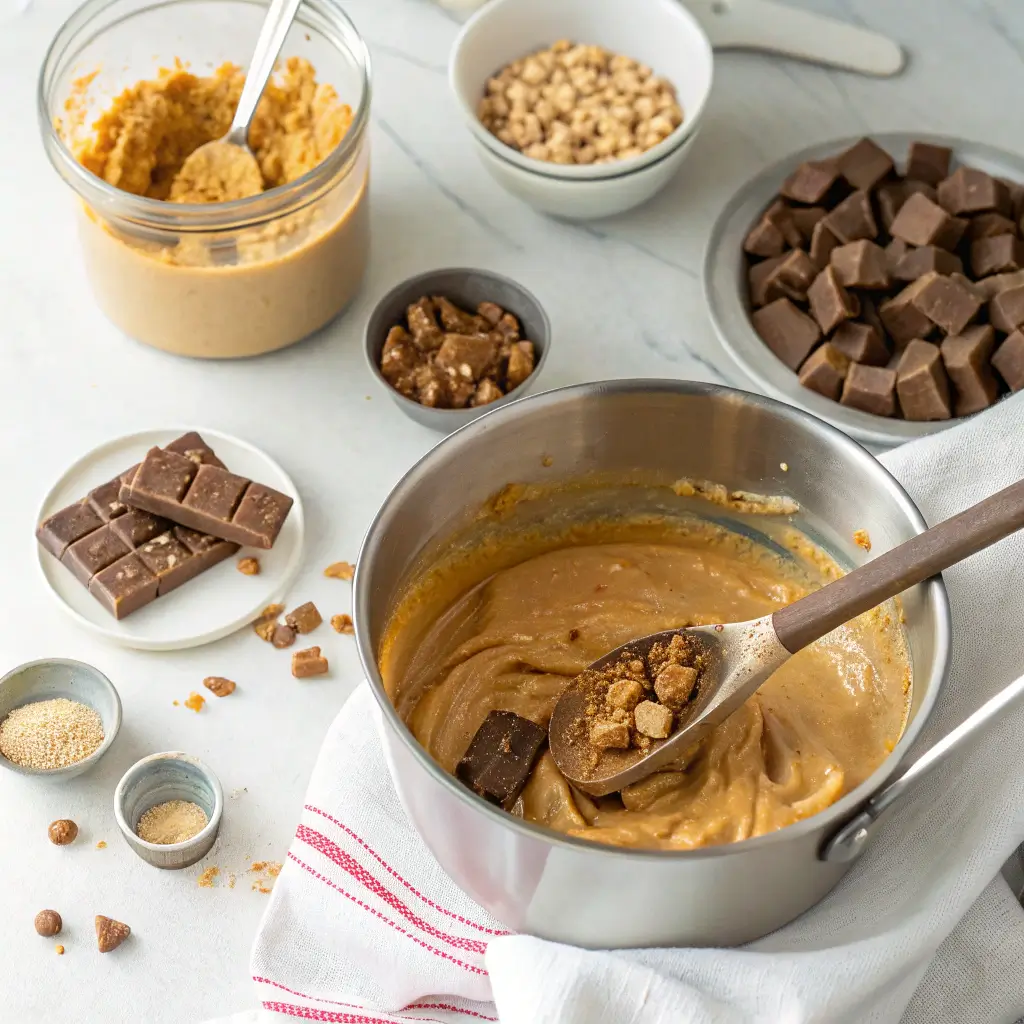
Melt and Mix:
- In a medium saucepan, gently melt the peanut butter and honey over low heat. Keep stirring until the mixture becomes smooth and fully blended.
- Then, remove from heat and quickly add the vanilla extract and a pinch of salt.
Incorporate the Candy Bars:
- Gently fold in the chopped butterfinger candy bars into the warm mixture. Use a spatula to ensure the candy is evenly distributed, which will help maintain the perfect texture.
Add the Cereal:
- Slowly mix in the crisped rice cereal. Stir thoroughly until every piece is coated with the melted mixture. This step is essential for ensuring a delightful crunch in every bite.
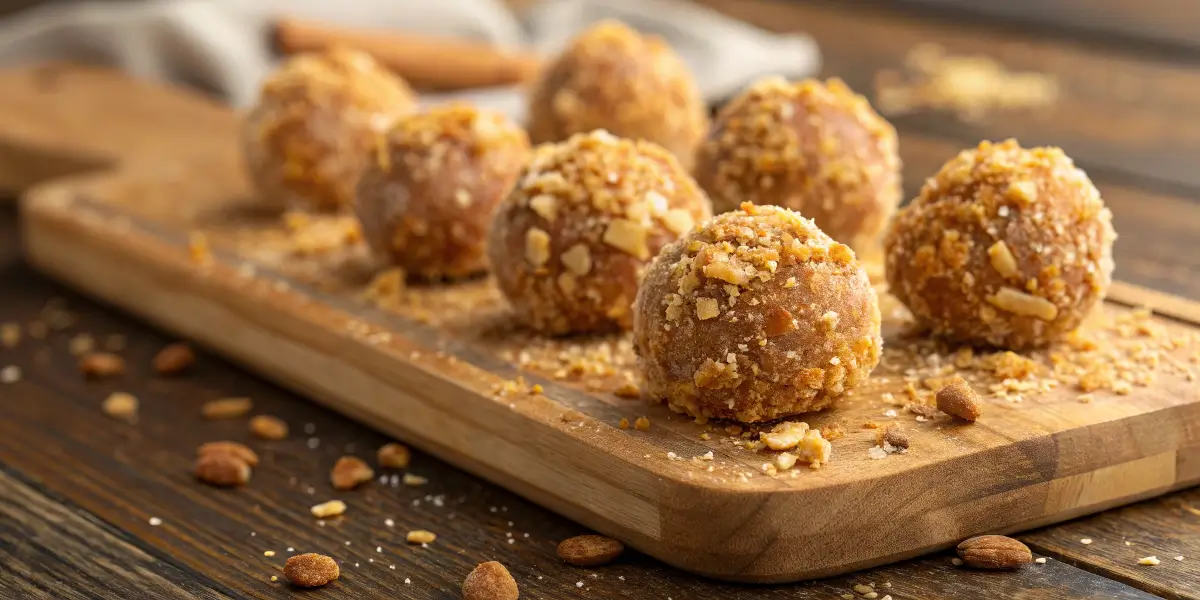
Shape the Treats:
- Scoop out small portions of the mixture using a spoon or your hands to form bite-sized balls. Place each ball onto a lined baking sheet, ensuring they’re evenly spaced.
Optional Chocolate Drizzle:
- For an extra indulgent finish, melt the dark chocolate chips in a microwave-safe bowl, stirring every 20 seconds until smooth. Drizzle the melted chocolate over each butterfinger ball for an eye-catching presentation.
Chill and Set:
- Transfer the baking sheet to the refrigerator for at least 30 minutes. This chilling step helps the balls firm up and enhances their flavor.
By following these steps, you’ll create a batch of butterfinger balls that are both delicious and perfectly textured. Enjoy the process, and remember, each step brings you closer to a treat that’s as delightful to make as it is to eat!
Pro Tips and Variations
Elevate your butterfinger balls recipe with these expert pro tips and creative variations that add an extra spark to your treat-making adventure. Here are some actionable insights to help you achieve the best results:
Tip 1: Perfect Texture Every Time
For a balanced crunch and chewy center, ensure that the melted mixture is not too hot when adding the candy bars and cereal. If the mixture cools too quickly, warm it gently over low heat while stirring continuously.
Tip 2: Creative Flavor Twists
- Spicy Kick: Add a pinch of cinnamon or cayenne pepper to introduce a subtle warmth that contrasts with the sweetness.
- Nutty Variation: Experiment by substituting peanut butter with almond or cashew butter for a different flavor profile and texture.
Tip 3: Dietary Alternatives
- Gluten-Free: Use gluten-free crisped rice cereal to ensure the recipe suits all dietary needs without compromising on crunch.
- Vegan-Friendly: Substitute honey with maple syrup and opt for dairy-free butterfinger alternatives, ensuring a delightful vegan treat.
Tip 4: Presentation and Storage
- Garnishing: Consider dusting the balls with a light sprinkle of powdered sugar or cocoa powder before serving.
- Storage: Keep your butterfinger balls in an airtight container in the refrigerator to maintain their perfect texture and flavor.
In addition, always feel free to experiment with these variations to match your personal taste or dietary requirements. With these pro tips, you’re not only mastering a butterfinger balls recipe but also adding your own creative flair, making every batch uniquely yours!
Serving Suggestions
Now that your butterfinger balls are ready, let’s talk about how to serve them for maximum enjoyment. Whether you’re planning a fun gathering or a cozy night in, these serving suggestions will elevate your dessert experience:
Perfect Pairings:
- Beverages: Pair your butterfinger balls with a refreshing glass of milk, a dairy-free alternative, or even a chilled herbal tea for a balanced treat.
- Sides: Complement the rich flavors with a light fruit salad or a scoop of vanilla ice cream to add a cool, creamy contrast.
Garnishing Ideas:
- Visual Appeal: Sprinkle a pinch of powdered sugar or cocoa powder on top before serving.
- Texture Boost: Consider adding a few chopped nuts or a drizzle of extra melted chocolate for an added crunch.
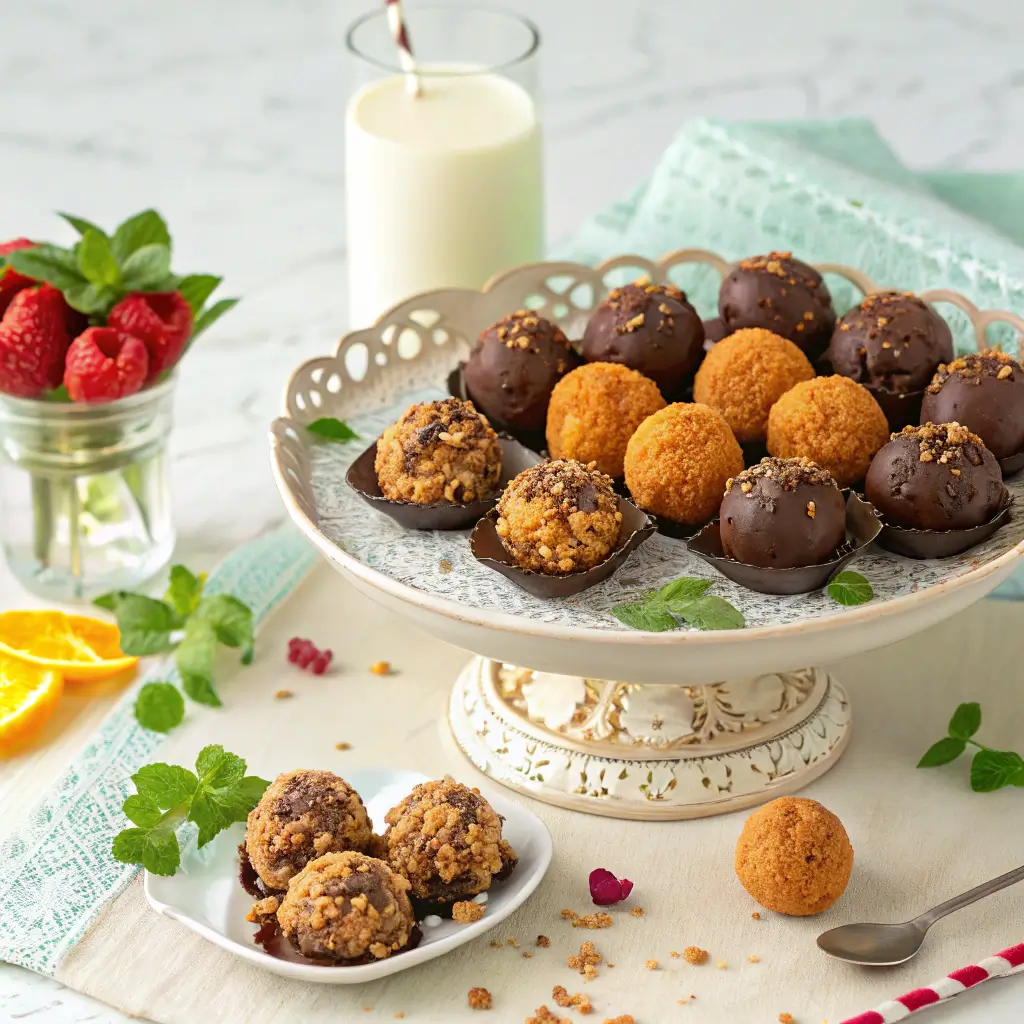
Creative Presentation:
- Plating: Arrange your butterfinger balls on a decorative platter or a stylish cake stand to impress your guests.
- Portioning: Serve them as bite-sized treats during parties, or as a delightful dessert after a meal.
- Layered Presentation: For a modern twist, layer them in small dessert cups with a dollop of whipped cream or yogurt, and top with fresh berries.
In addition, feel free to experiment with these suggestions based on your personal taste and the occasion. By thoughtfully pairing and presenting your butterfinger balls, you’re not only enhancing their flavor but also creating an inviting, shareable experience. Enjoy serving these treats and watch as they become the star of your next culinary adventure!
Common Problems and Solutions
Even the best recipes can encounter a few hiccups along the way. Here are some common issues you might face with your butterfinger balls recipe, along with practical solutions to keep your treat-making process smooth:
Problem: Mixture Too Thick or Lumpy
Solution:
If your melted mixture seems too thick or forms lumps, gently reheat it over low heat while stirring continuously.
Alternatively, add a teaspoon of your chosen nut butter or a splash of a non-dairy milk to smoothen the consistency.
Problem: Candy Bars Not Mixing Evenly
Solution:
To ensure the chopped butterfinger candy bars blend seamlessly, make sure the melted mixture is warm enough but not too hot.
Stir slowly and consistently, allowing the candy pieces to soften slightly for better incorporation.
Problem: Cereal Clumping Together
Solution:
If you notice the crisped rice cereal forming clumps, mix it in gradually.
Use a gentle folding motion to coat the cereal evenly, and if needed, add it in batches to maintain the desired crunch.
Problem: Treats Not Firming Up Properly
Solution:
After shaping your butterfinger balls, ensure they are chilled for at least 30 minutes in the refrigerator.
If the balls remain soft, extend the chilling time by another 15 minutes, which will help them set perfectly.
In addition, remember that minor adjustments are part of the fun of cooking. By following these tips, you can troubleshoot any issues quickly and continue enjoying the creative process. With a little practice, your butterfinger balls recipe will turn out beautifully every time!
Conclusion
In summary, this butterfinger balls recipe is not just a treat—it’s an experience that combines convenience, flavor, and creative versatility. Here’s a quick recap of what makes this recipe a must-try:
- Deliciously Unique: Each bite delivers a perfect balance of crunch and chew, making it a standout dessert.
- Nutritionally Thoughtful: With carefully selected ingredients, you enjoy a snack that’s both satisfying and energizing.
- Easily Adaptable: Whether you prefer gluten-free or vegan options, this recipe offers room for personalization.
- Fun and Rewarding: From the mixing process to the final presentation, every step is designed to be both enjoyable and visually appealing.
Now that you’ve got all the tips and tricks, it’s your turn to bring this delectable creation to life. I invite you to try out the recipe, experiment with your favorite variations, and share your results. Your feedback is incredibly valuable, so please let us know how your butterfinger balls turned out in the comments below! Hungry for more delicious creations? Browse our site for more recipes and endless inspiration to spark your next culinary adventure!
Butterfinger Balls Recipe
Ingredients
- 10 Butterfinger candy bars roughly chopped (use dairy-free if needed)
- 2 cups crisped rice cereal gluten-free option available
- 1/2 cup peanut butter or almond butter for a vegan alternative
- 1/3 cup honey sub with maple syrup for vegan-friendly version
- 1 teaspoon vanilla extract
- A pinch of salt
- 1/4 cup dark chocolate chips optional, for drizzling – choose dairy-free if needed
Instructions
1️⃣ Prepare Your Workspace
- Gather all ingredients and equipment. Chop Butterfinger bars and measure out crisped rice cereal.
2️⃣ Melt and Mix
- In a medium saucepan, melt peanut butter and honey over low heat. Stir until smooth. Remove from heat and mix in vanilla extract and salt.
3️⃣ Incorporate the Candy Bars
- Fold in the chopped Butterfinger bars until evenly distributed.
4️⃣ Add the Cereal
- Stir in the crisped rice cereal until fully coated.
5️⃣ Shape the Treats
- Use a spoon or hands to form bite-sized balls. Place them on a lined baking sheet.
6️⃣ Optional Chocolate Drizzle
- Melt dark chocolate chips and drizzle over the balls for an indulgent touch.
7️⃣ Chill and Set
- Refrigerate for at least 30 minutes to firm up before serving.
Video
Notes
Swap peanut butter with almond or sunflower butter for allergy-friendly options.
For extra crunch, add chopped nuts or shredded coconut.
FAQs
Can I make butterfinger balls recipe ahead of time?
Yes, absolutely! You can prepare the mixture ahead of time and shape the balls just before serving. Once formed, store them in an airtight container in the refrigerator for up to one week.
How do I make the recipe vegan?
To create a vegan version, simply substitute peanut butter with your favorite plant-based alternative, replace honey with maple syrup, and choose dairy-free butterfinger or candy alternatives. This ensures your treat remains delicious and ethical.
What if I don’t have crisped rice cereal?
No worries! You can substitute with other gluten-free cereals or even use finely crushed gluten-free pretzels for a unique crunch that still delivers a satisfying texture.
How can I adjust the sweetness of the butterfinger balls?
If you prefer a less sweet treat, reduce the amount of honey or maple syrup slightly, or opt for a version with unsweetened peanut butter. Experiment with the balance until you find your ideal level of sweetness.
Is it necessary to chill the balls for exactly 30 minutes?
While 30 minutes is recommended to achieve the perfect texture, you can adjust the chilling time based on your preference. If you like a firmer bite, extend the time by 10-15 minutes; if you enjoy a softer texture, you might reduce the time slightly.
In addition, if you have any other questions or need further assistance, feel free to reach out in the comments or through our contact page. We’re here to help you enjoy every step of your butterfinger balls recipe adventure!